Flash the Image
This section details the steps for flashing your device. Ensure you’ve completed the prerequisites and set up the usb-tool as described in previous sections.
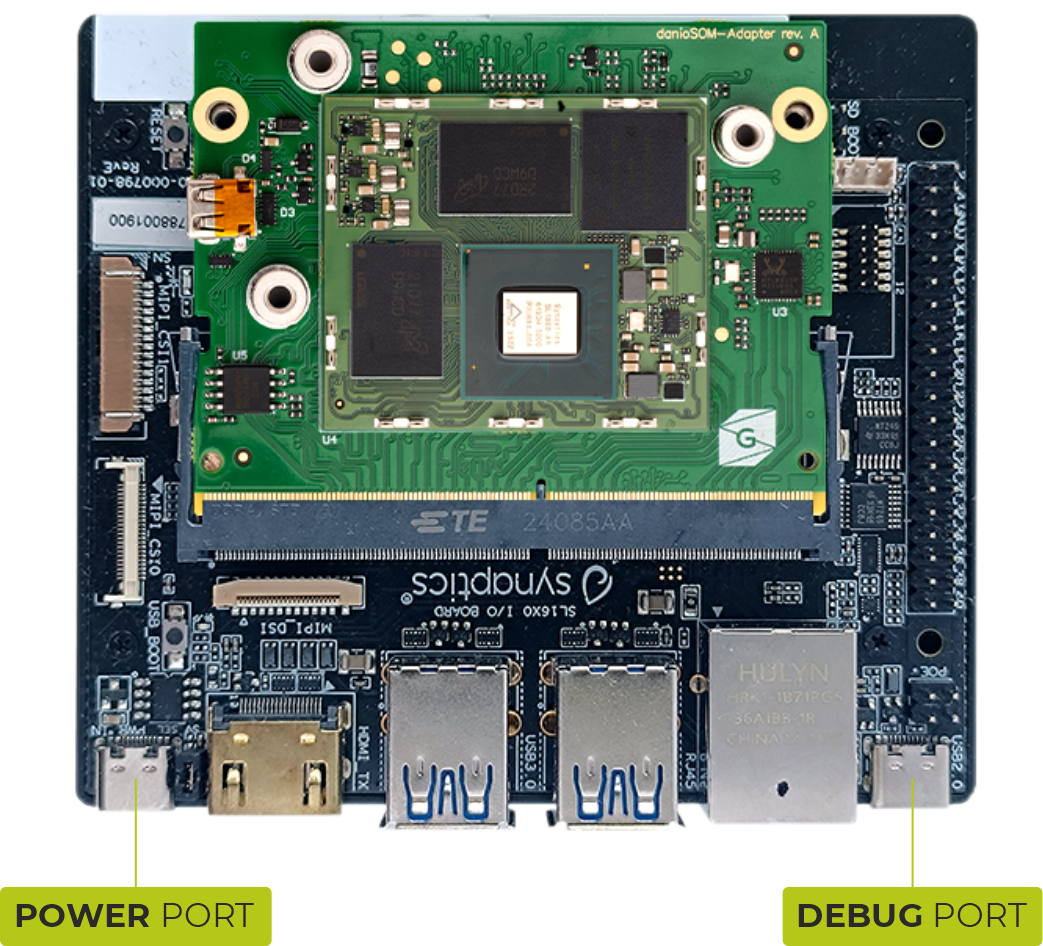
Connect the board
Flashing Grinn AstraADA-1680 requires:
external 5V USB-C Power Delivery power source,
Debug USB port connected to the host PC.
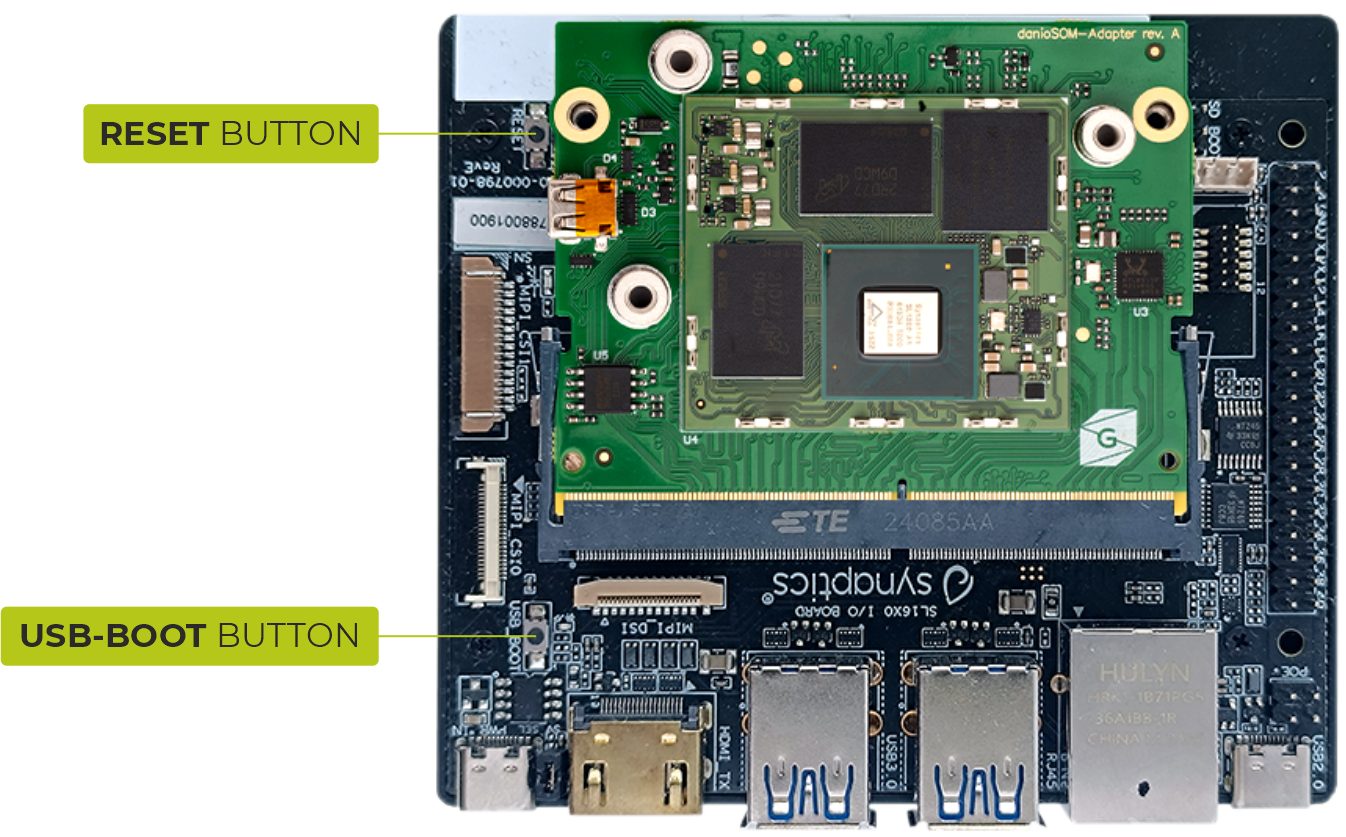
Manually enabling download mode
To flash the Grinn AstraADA-1680, it must first be in download mode. Follow these steps carefully:
Locate the buttons: Find the RESET and USB_BOOT buttons on your device. Refer to picture below for details.
- Enter bootloader sequence:
Press and hold both the RESET and USB_BOOT buttons simultaneously.
While still holding USB_BOOT, release RESET.
Wait a moment, then release USB_BOOT.
Grinn AstraADA-1680 should now be in download mode.
Flashing
Once the usb-tool is ready and your device is in download mode, you can proceed with flashing the firmware.
- Navigate to the root directory of your Yocto build
Open new terminal (do not use Grinn Yocto Docker container) and navigate to the root directory of your Grinn AstraADA-1680 Yocto build.
cd /path/to/your/yocto/main/directory
- Execute the flashing process:
Use the
flash-grinn-astra.shhelper script to flash your device, specifying the path tousb-tooland selecting AstraADA platform. Proper image will be selected from Yocto build tree automatically:./src/meta-grinn-astra/scripts/flash-grinn-astra </path/to/your/usb-tool> adaIf you have a pre-built image to be flashed you can specify path to the image manually:
./src/meta-grinn-astra/scripts/flash-grinn-astra </path/to/your/usb-tool> ada [/path/to/pre/built/image]
Note
Monitor the flashing process: The script will display progress updates in your terminal. Do not disconnect your device or interrupt the process until it completes successfully.
Verify the flashing (optional but recommended): After the flashing is complete, an appropriate success message will appear in the script’s output.
Troubleshooting
- Failed to boot device / Device not detected:
- Common Messages:
“Boot Failed: Timeout during boot, press RESET while holding USB_BOOT to try again”
“Failed to Boot Device”
- Solution:
Confirm your device is correctly in download mode by repeating the steps in the Manually enabling download mode section.
Check your USB cable and connection.
- Flashing tool errors:
Ensure you are running the command with
sudo.Double-check the command syntax and the path to your firmware image.
Refer to the
usb-tool’s documentation or its GitHub repository for specific error messages.
- Flashing fails mid-process:
Do not disconnect the device.
Put the device back into bootloader mode by repeating the steps in the Manually enabling download mode section and attempt to re-flash.
If the issue persists, your firmware image might be corrupted, or there could be a hardware issue with your device.